Friday, August 21, 2015

Birthday Cards

Hi everyone!
I've got two birthday cards to show you guys today.  Not much to say here but check back next week for more crafts!


Friday, July 17, 2015

DIY Puppy Bookmark

Hi everyone!
I'm really sorry I haven't posted for such a long time!  But, here's a absolutely adorable little puppy bookmark to cheer you up!  It's a super fun craft to do with kids during these long summer days and it really does work as a bookmark because his paws hold onto the page. Here's how to make it!

Materials: thick cardstock, colored pencils, a marker, and scissors

1. Sketch out the shape and trace it with your marker.  Make sure you draw arms that slightly overlap the body.
2. Then color until your desired look is achieved.
3. Cut out it's shape and it's arms so it can hold your place in a book.


Sorry if that didn't really make sense but I hope you can try to figure it out from the photo. Oh, and you don't need to make a dog, you can really make any animal you want.  I tried out a cat and bear and they were just as cute.  If you have any questions or craft requests, please leave comment down below.  Thanks so much and I'll see you next week!  

Friday, May 8, 2015

How to Paint a Galaxy

Hello everyone!!
Today I'm showing you how to easily paint a galaxy!  By the way, I came up with this tutorial myself in case you were wondering.  Sorry if the shots aren't perfect because I took them in the process.  If you have any questions or requests, please tell me in the comment section below. They are very much appreciated.  Let's get painting!

1. Gather your materials!  I used tempura paint, acrylic paint, black cardstock, and a variety of brushes.
2. Add a wash of gray and black paint to add the feel of a galaxy.  Try to make your strokes in the same general direction.
3.  Splatter!  Grab a old tooth brush and dip it in white paint and then use your finger and run along the bristles to make a splatter. You can also water down white paint and splatter with a brush.  
4. Start the sponging!  Use a sponge to add wisps of white, gray, black, and touches of blue and red in stripes across the paper.  I went diagonally.
5. And more stars!  Continue to add stars using a brush, toothbrush, or even a toothpick (to manually add individual stars) in red, blue, and white.  Another tip is to set your paper in a large box lid like I did in this photo and previous ones to prevent splatter from going everywhere.
6.  The finishing touches!  More stars, more paint, more sponging, more splatter! Continue painting until your satisfied with your galaxy.  

7.  And then you're done!  Remember, that each painting will turn out differently.  Below is another galaxy I painted!  Oh, and make sure to comment, share and check back next Friday!

Friday, May 1, 2015

Easy and Cute Hand-sewn Felt Cube

Hi everyone!
I hope your having a great Friday!  Anyway, today we're making the most adorable felt cube! And it even has a cute little face!  But don't worry!  It's super easy to hand-sew!  And even if you absolutely can't sew, you can still do this with hot glue or fabric glue.  Sew let's get started!! (I know that was really cheesy, but I like it!)


Step 1: Cut out 6 squares of felt or fabric of choice and two circles of black and two ovals of pink (they don't need to be perfect)

Step 2: Sew the facial pieces onto one square using any stitch you want.  I used a running/straight stitch which is just an up and down stitch.  Then stitch on it's mouth.  If you need any help with step 2-3 there is plenty of tutorials on YouTube.  I recommend Tammy Hallam's tutorial here.  

Step 3: Then sew each square to each other to form a cube.  Before completely sewing it shut, add stuffing being sure to stuff the corners.  

Friday, April 24, 2015

Easy Play Clay

Hi everyone!
First of all, I'm really sorry that I didn't post last week.  I completely forgot!  Anyway, I a tutorial for you guys this week that's great for little children.  Play clay!  Check back next week for more crafty tutorials and comment down below if you'd like to see some greeting cards, painted galaxy tutorial, or get organized!  Thanks for stopping by!! 


Ingredients

- 2 cups of sifted flour
- 1 cup of salt
- 6 teaspoons of alum (Alum acts as a preservative.  You don't need it, but it will stay longer if you include it.  If you don't, add extra flour.)
- 2 tablespoons of vegetable oil
- 1 cup of water
- food coloring (optional)

Directions 

1. Mix all materials together (except the food coloring) in a medium-sized bowl until they form a dough.
2. Carefully knead the food coloring into the clay.  Six drops of blue gave me a really pretty pastel green/sea foam blue.  (It doesn't really show up of camera though)
3. Store the play clay in a sealed bag or air tight container.  


Friday, April 10, 2015

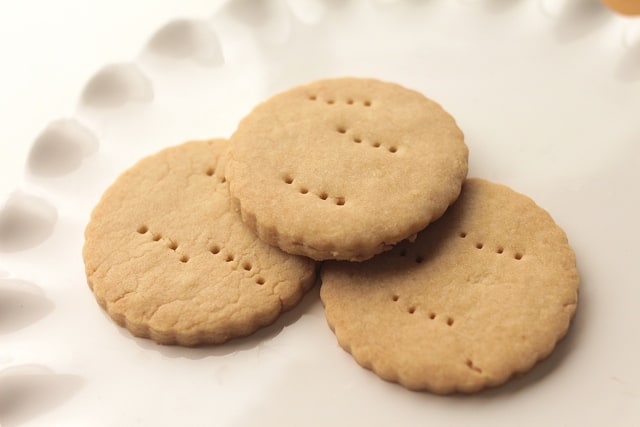
Shortbread Cookies (Recipe 2)


Hi everyone!
As promised, we're making another type of shortbread cookies today!  I found this amazing recipe on Simply Bakings.  The link to the original recipe is HERE.  By the way, I halved Simply Baking's recipe. Oh, and I would show you a picture but they were gone before I thought of it, so here's the picture from her blog.  :)  Please comment if you want to see a tutorial on play clay and check back next week for my crafty fun!

shortbread cookies

Ingredients
1 stick butter (8 tbs), softened
1/4 cup packed brown sugar
1 1/8 cups all-purpose flour
(Makes about 10 cookies)

Directions
1. Preheat oven to 300 F.
2. In a large bowl, cream butter and sugar until light and fluffy and gradually add flour until well combined.  Then refrigerate for 5 minutes.
3. Lightly flour work area and roll out cookie dough until your desired thickness. Cut out cookies and place on a cookie sheet.  Then poke holes with a fork.
4. Bake for 25 minutes.  Let cool and enjoy!

Friday, April 3, 2015

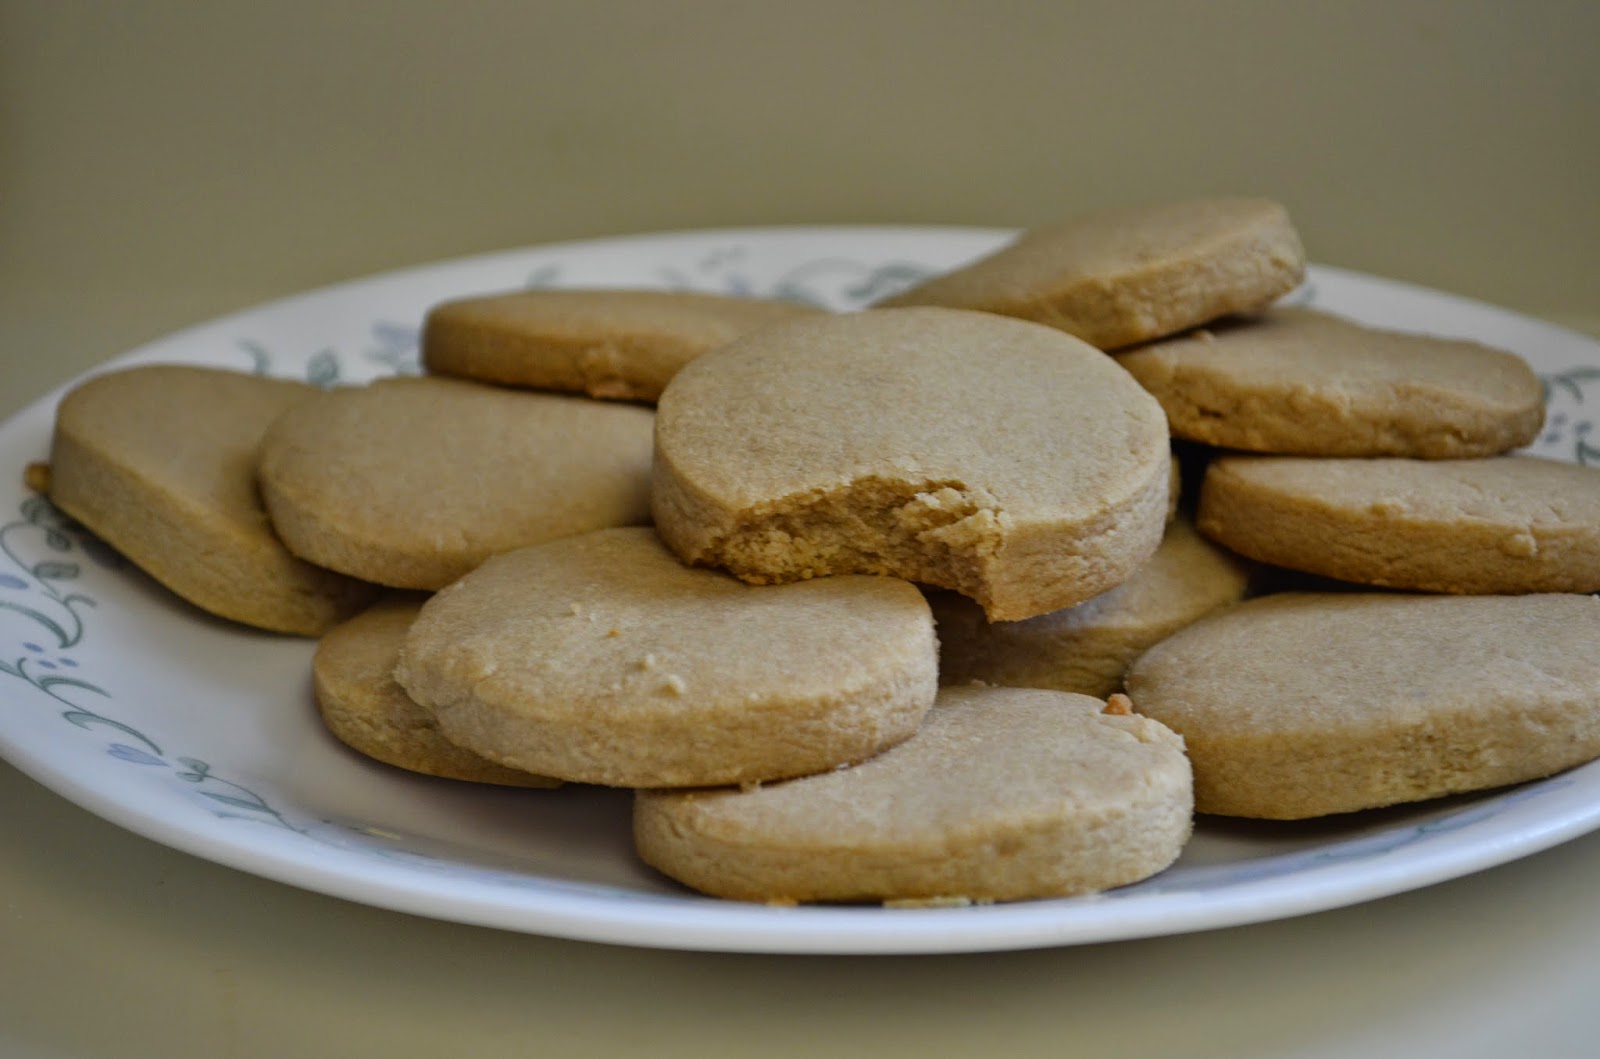
Shortbread Cookies (Recipe 1)

Hello everyone!
We're making cookies today!  Next week I'll be showing you how to make another recipe for shortbread cookies.  I've got this weeks recipe below.  These are really good and crumbly and are really fun to make too!  In our house, they were gone in just a few days!  I found this amazing recipe on the Comfort of Cooking website.  The link to the original recipe is HERE.  Make sure to comment and share and check back next week!
  

Ingredients:
1 cup (2 sticks) butter, softened
1/2 cup powdered sugar
2 cups all-purpose flour

(makes approximately: 16 cookies)
Directions:
1. Preheat oven to 350 degrees F. Prepare two large baking sheets lined with parchment paper.

2. In a large bowl, cream together butter and sugar. Add flour and continue to mix until mixture forms a soft dough. 
3. Form dough into a cohesive ball with your hands.
4. Roll dough 1/4-inch thick on a surface dusted with flour or powdered sugar with a well-dusted rolling pin. Cut into desired shape and place on sheets. Repeat as necessary.
5. Bake for 16-18 minutes, or until cookies are pale golden brown. Let cool on baking sheets.  Enjoy!

Friday, March 27, 2015

"The Lost Get Found" Lyric Art

Hello everyone!
I've got a really quick post for today.  It's a lyric art for the Britt Nicole "The Lost Get Found"  song.  I used sharpie markers, gel pens, and highlighters.  Please comment and share and check back next week!

Britt Nicole - The lost get found - Lyric Art


Saturday, March 21, 2015

Quick Update: New Schedule

Hi everyone!
I'm so sorry that I missed Wednesday and Friday.  I've decided that twice a week is a little too much for me and that I'll only be posting on Fridays.  I'm really sorry that I can't do it more often, but this is going to be my new schedule for a while.  


See you all on Friday and happy Spring!

Friday, March 13, 2015

3 Cute Birthday Cards

Hi everyone!
So, today I was checking my stash of cards and I realized I was really low on birthday cards. As a result of that, I made three fun and cute birthday cards.  The two closer to the left I used my silhouette cameo for the cake and the cupcake.  If you want a tutorial on how I did that, comment down below and check back on Wednesday.  I used the masking technique that I showed you a few weeks ago for the middle card.  For the right card, I used a bunch of pieces from a K&Company stack and a little bit of washi tape.  The sentiment tag was something I got in a kit.  And lastly, for the farthest left card, I used a pattern paper from the Paddywack stack and the little cupcake is from Recollections.  All my card bases were A2 size and are Recollections White Cardstock.  By the way, next time I'll announced the answer for The Messy Room Update so please share and comment and check back next Wednesday!!


Wednesday, March 11, 2015

Get Organized: Messy Room Update

Hello Everyone!
So, I know I haven't been doing any Get Organized projects in a while and I really have been wanting too as well.  The only problem is I don't have any motivation and to clean up that wreck.  So, I've hidden my previous projects all over my messy desk for you guys to find.  It's not a DIY, but I'll hopefully be back on Friday with some actually organization projects.  Make sure to comment how many projects you think I've hidden and any other future project ideas!  

Friday, March 6, 2015

Butterfly Card - Flying Away

Hi everyone!
If you've been following me, you would know that I love butterflies and flowers on my cards. And today is no different; I've got another butterfly card for you guys.  I didn't put any sentiment on there, but I might as I need more cards for upcoming occasions.  I cut the butterflies from my cameo, but you could cut them pretty easily by hand.  The materials are below and please comment and share what you'd like to see on Wednesday!


Materials: Silhouette Cameo butterfly die-cut, grosgrain ribbon, Recollections pastel purple cardstock, Recollections beet opaque marker, My Mind's Eye Miss caroline - All dolled up paper stack, DCVW fresh floral paper stack

Wednesday, March 4, 2015

1 Mask 2 Ways - Technique Birthday Cards

Hello everyone!
It's almost spring!  Today, I'm showing these two super cute birthday cards using the same circle mask in different colors.  I used removable circles for this but if you don't have those you can just use the sticky part of a post-it-note apply your ink and then peel them off.  I used the negative part for the right card by simply moving it around until I had enough dots. 
Please comment and share and check back on on Friday!


Here are the stamps I used!
Materials: 
2 Studio G stamps, grosgrain ribbon, yellow duck tape, circle masks, Recollections cardstock, Tom-bow Mono adhesive tape runner, and a K & Company "celebrate" tag 

Friday, February 27, 2015

Get Organized: Recycled Containers

Hi everyone!
Today, I'm using two different materials that you probably have.  What are they?  Plastic cups and a cereal box.  I'm organizing pattern paper stacks and re-doing my ribbon scraps.  Yup, I'm re-doing the other ribbon tutorial too.  Let's start with the cups.  My old version didn't work very well because it marks from wrapping it around and the ribbon kept falling off.  But, by coloring these cups and throwing them in there, they stayed in there color groups but didn't get any wrinkles.  


My second idea is with the cardboard box.  I've seen this all over the internet and Pinterest so I decided to make one of my own.  It's basically a magazine holder made out of a cereal box used for holding pattern paper stacks.  It's pretty easy because all you have to do is cut diagonally across the box and paint it.  


Comment and share and check back on Wednesday to see  a new tutorial!

Wednesday, February 25, 2015

Banana Bites Recipe

Hi everyone!
I'm finally doing another recipe!  Yay!  
Today, I've got a super easy one with only three ingredients that's really yummy.  Don't worry I'll still be doing my Get Organized series but I'm currently taking a little break. (aka:leaving my craft room a mess and only barely tidying it when I absolutely have to)  Comment if you want to see another recipe or share your own ideas.  See you on Friday!


Ingredients:  a banana (1 banana made about eight of these), toothpicks, nutella (or peanut butter), and honey.
Step 1: Slice the banana into about 1/4 in. slices
Step 2: Spread honey on half of the bananas and nutella on the other half
Step 3: Squish them together and add a toothpick

Wednesday, February 18, 2015

Get Organized: Ribbon Re-do

Hi everyone!
As you probably know, I made a post on how I organized my ribbon spools.  But the rubber band technique just wasn't working.  So, I bring you my re-do of how I now keep my ribbon spools from unraveling.  I got this idea from one of Connie Stewart's 2 minute tip videos. Check it out here
Well, all you need for this is a pair of scissors.  Simply cut slits into your roll and slide your end of ribbon into the slit.  I know it isn't as pretty but it work much better.  Make sure to watch Connie's video for more detail and I hope to see you all again on Friday!


Friday, February 13, 2015

Two Thank You Cards for You!

Hello everyone!
Let's start off by saying Happy early Valentine's Day!!  Yay!
Anyway, today I'm sharing a few new thank you cards that I've made recently.  Please comment and share and check back on Wednesday!

Card 1:
 Main Materials:
- Pastel Recollections purple cardstock
- Studio G Pink pattern paper
- Recollections fabric flower embellishments
- Recollections Hot Pink opaque broad tip marker
- Crafter's Square flower jewels
- Details Accessories ribbon
- Tombow Mono tape runner adhesive 

Card 2:

Main Materials:
- Recollections white cardstock
- chipboard alphabet letters
-  Recollections Paddy-Wack paper stack
- DCVW tag
- chipboard butterfly

Wednesday, February 11, 2015

Get Organized: Ribbon Scraps

Hello Everyone!
A few weeks ago I showed you how I organized my ribbons spools.  But if you are like me, you have a bunch of extra ribbons stuffed into a bin.  Well, today, I'm showing you a way to keep them nice and neat!  I sorted the ribbons by color and then wrapped the ribbons around index cards in the same color and taped the ends down.  If you enjoyed comment, and I'll see on you on Friday!


Friday, February 6, 2015

Get Organized: Stamps and Ink Pads

Hello Everyone!
Today, I'm sharing with you how I organized my stamps and ink pads.  Sadly, this isn't a DIY but I have a lot of DIY storage coming up so stay with me!  I have more wood block stamps then clear stamps, so I placed all of my clear stamps in a bag to avoid them collecting dust and dirt.  As for all my rubber stamps, I've simply placed them in a large drawer for easy access.  I don't have very many ink pads either so I stashed them away in a little space maker container.  If you enjoyed, please comment and I hope to see you again on Friday!


Wednesday, February 4, 2015

Weekly Posts!!

Hello Everyone!!
Recently, I've been posting all over the place.  So, I'm very excited to tell you that I will be posting every Wednesday and Friday from now on. I have a lot more in store so check back weekly because I can't wait to share with all the projects I've been doing including my final reveal of my Get Organized series!  You can also follow me on Pinterest here, and on Google + here.  See you all on Friday!

Birthday Cards

Hi everyone! I've got two birthday cards to show you guys today.  Not much to say here but check back next week for more crafts! ...